
New upgraded Webforms extension for vTiger 7.x will collect the URL of the pages that web form was sent and will collect UTM metrics. So advertising will be more efficiency and results would be more understandable.
Features
- Collect in vTiger CRM URL of page where webform was submitted.
- Collect in vTiger CRM utm_source, utm_medium, utm_campaign and utm_keywords metrics from weblink
- Updating current vTiger Webforms module - no any custom modules
- No settings - just install and use
Installations steps
1. Go to Vtiger CRM Menu -> Settings -> CRM Settings
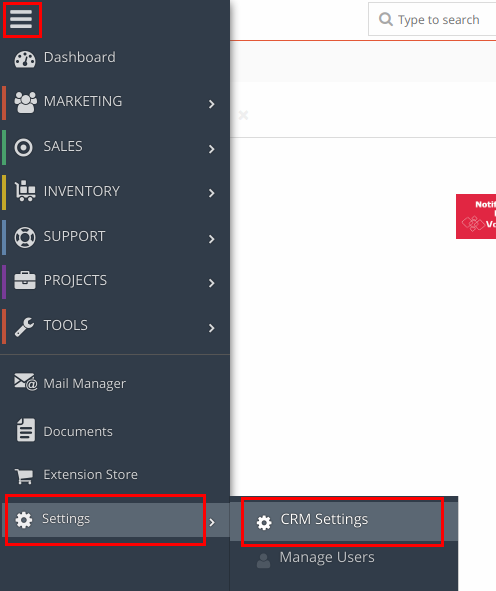
2. Go to Module management -> Modules

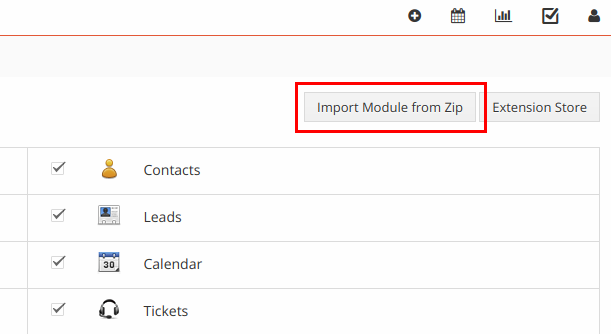
3. Click Import Module from Zip button in right corner.
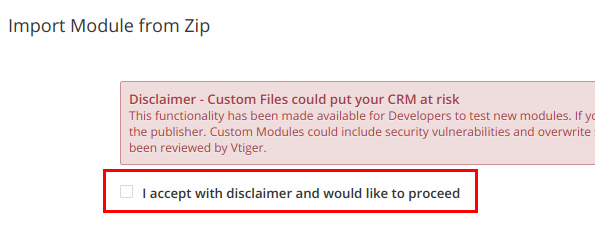
4. Check I accept with disclaimer and would like to proceed
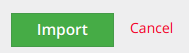
5. Click button Select from My Computer and choose VDWebforms zip archive from your computer

6. Click Import button at the bottom of the page
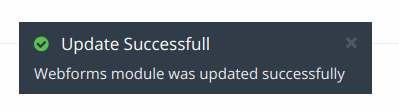
7. Wait information that module Webforms already exist.

8. Click Update Now button at the bottom of the page

9. Wait information that module Webforms 2.0 has been updated successfully
WEBFORMS extension for vTiger CRM can collect UTM parameters for any module selected in Webform.
After extension installation you need to add extra fields into module you use in Webform to start collect UTM parameters. As an example we will add extra fields into Leads module.
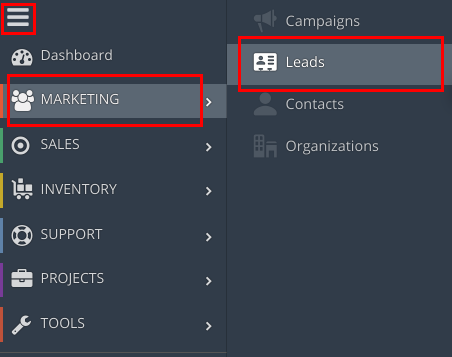
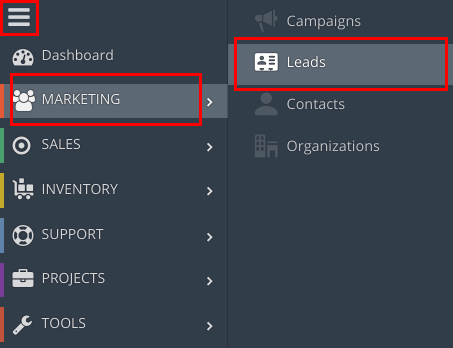
10. Go to VtigerCRM Menu -> Marketing -> Leads
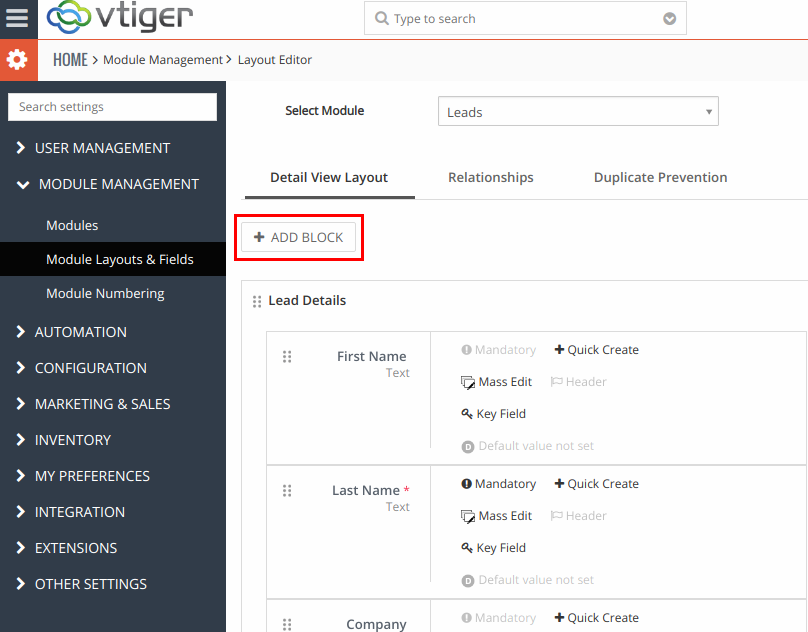
11. Click Customize button, then select Leads Fields & Layout

12. Then we will change layout of Leads module by adding extra block for UTM parameters. Click ADD BLOCK button
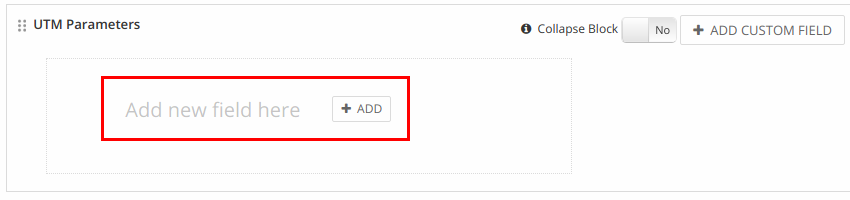
13. Name new block as “UTM parameters”

14. Scroll down to block “UTM parameters” and click ADD button
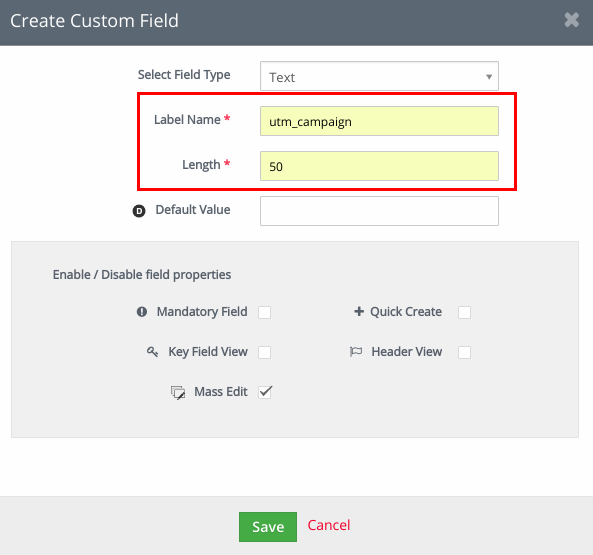
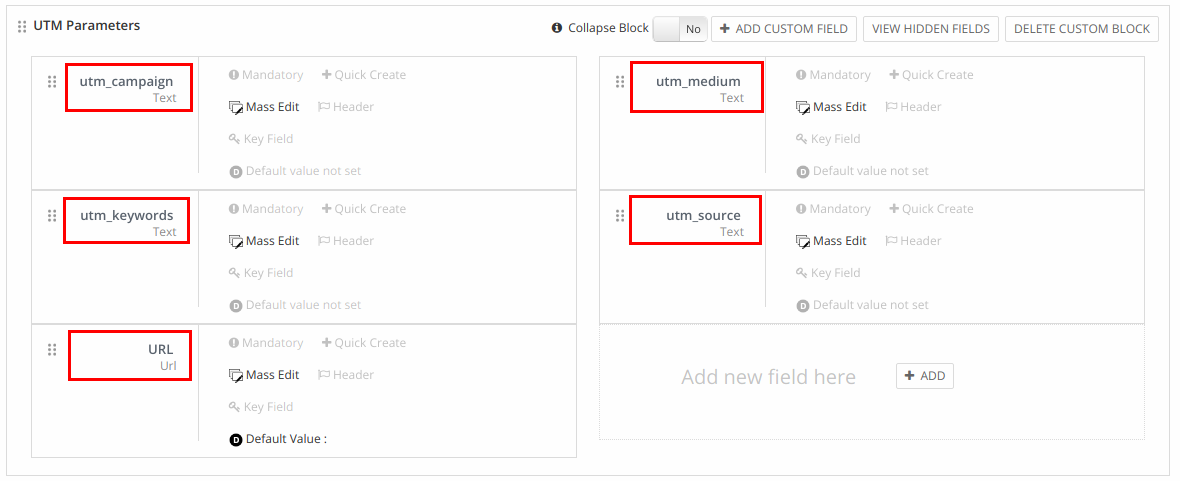
15. Name new field as “utm_campaign”, set length as 50 characters (or other) and click Save button.
16. By similar steps add additional fields as “utm_medium”, “utm_source”, and “utm_keywords”.
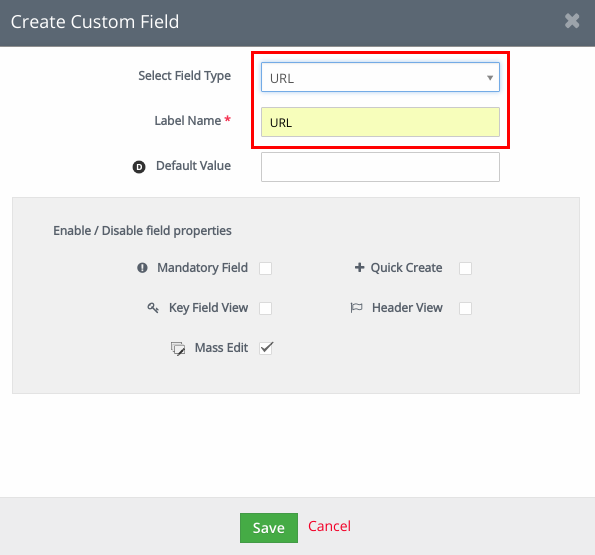
17. By similar steps add additional field as “URL”, but in this case select field type as “URL”.
As result you should have 5 additional fields in new block “UTM parameters”.
18. Set up Webform. Here you can see documentation on how to set up Webforms.
https://www.vtiger.com/docs/webforms
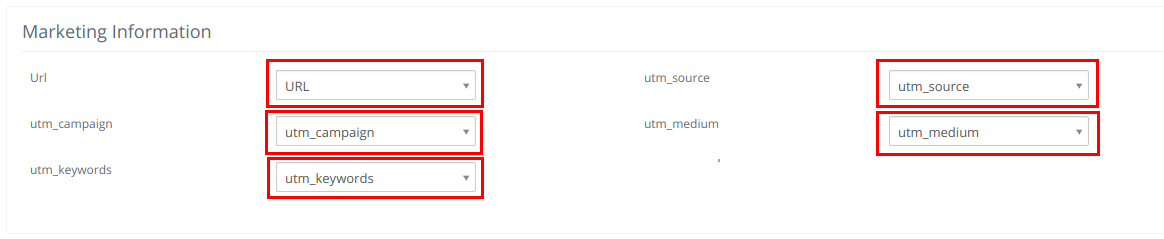
19. When you creating new webform you need to assign UTM parameters to fields In Marketing Information block. You need to select fields which was created in Leads module.
20. If you want to keep UTM parameters in URL from one page to another, insert this code into <head></head> tags in template of your site.
<script>
$('a').each(function(i, el){
$(this).attr({
href: $(this).attr("href") + window.location.search
});
});
</script>
21. As an example we have created demo form and have passed it UTM parameters. Fill this form and check result in vTiger CRM demo.
22. Log in to VorDOOM vTiger CRM 7.x demo by following credentials.
login: demo
password: demo
23. Go to Menu -> Marketing -> Leads
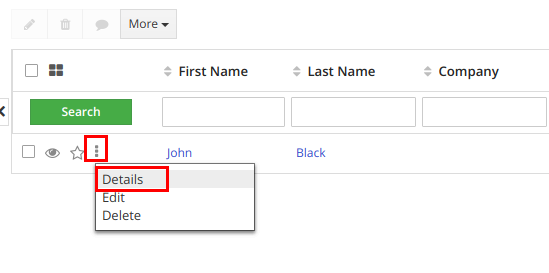
24. Select Lead that you have passed after filling the form, click three dots -> Details
25. Scroll down to UTM Parameters block. Here you can see utm parameters which was collected by VorDOOM WEMFORMS extension for vTiger CRM.

Comments
Log in or register to post commentsOur team has enough experience in vTiger CRM to bring all your ideas according to life. Our experts will analyse your business needs and recommend you how to solve it better. And after our developers make it in your crm system.
What we do
- Basic functional upgrade and customization
- Migration crm to higher version
- Migration from another crm to vTiger
- Extensions and Modules Development
- API integration with other software
- 2rd, 3rd lines technical support
Send us your requirements by webform below and we will estimate it and back to you soon. Also you can send it on support@vordoom.com